购物车空
继续购物War Chest turns ordinary looting into a timed race. Our team quickly found that the event rewards players who move with a plan, not those who open every container they see. A good run starts with a clear target: build a reliable route, reach one or two safes before the lobby becomes crowded, and leave with enough time to protect the score. That approach also makes the event a useful training ground for movement, map awareness, and controlled MW4 Boosting without turning every match into a reckless firefight.
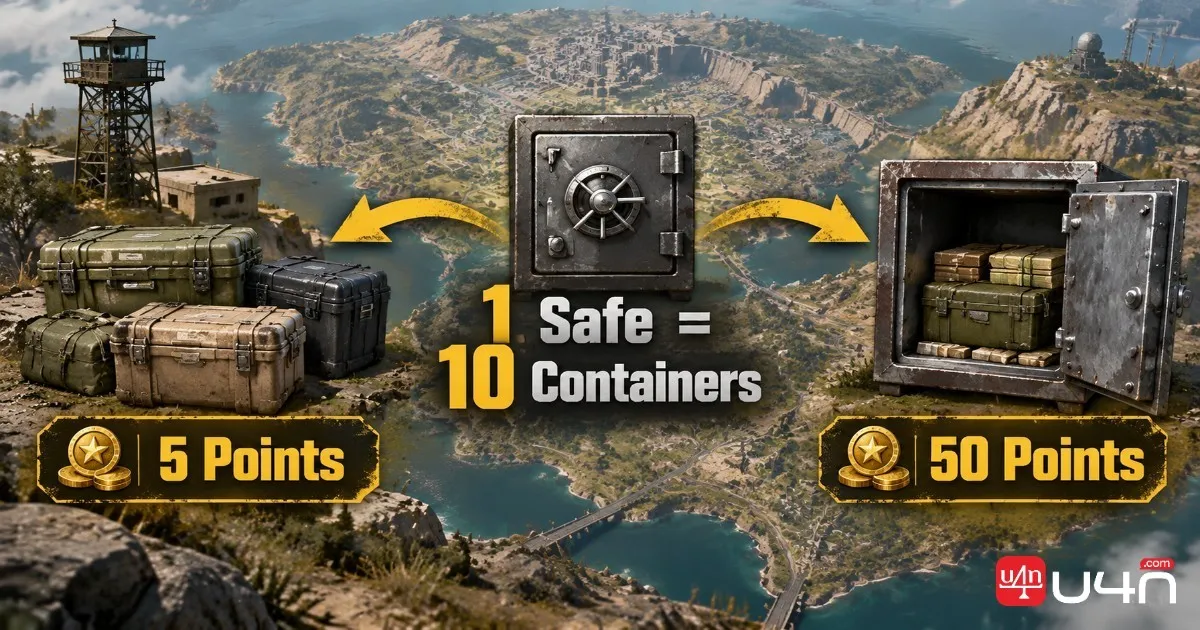
The main question is simple: should you spend your time opening regular containers, or should you take the risk of hunting safes? Regular containers give five points, while safes give fifty. One safe therefore matches the value of ten regular containers. The leaderboard remains active for three hours, with a new round beginning every four hours. Available rewards include Fulton Exfils, Tempered Armor Vests, UAVs, and Survival Kits, with each reward earned only once.
That difference changes the way we approach every deployment. Regular containers are useful for steady points and low-risk progress. Safes are the real scoring targets, especially during the opening minutes of a leaderboard round. The strongest route usually combines both: move through a compact group of buildings, open a safe when it sits close to your path, collect nearby containers, then rotate toward an extraction point before the map becomes too dangerous.
The scoring system is easy to understand, but the timing around it creates most of the strategy.
| Loot target | Points earned | Practical value |
|---|---|---|
| Regular container | 5 points | Fast, safe, widely available |
| Safe | 50 points | High reward, slower and riskier |
| Ten regular containers | 50 points | Equal to one safe |
A safe looks ten times better on paper, and in many situations it is. However, the real value of a safe depends on its location. If the safe is inside a busy compound, surrounded by AI patrols, or several hundred meters away from your current route, the time spent reaching and securing it may reduce its advantage.
We measure each route by points per minute rather than points per container.
A safe that takes two minutes to reach, clear, and open can be excellent. A safe that takes five minutes to approach while your squad crosses open ground may be a poor target, even if nobody contests it.
The event also rewards players who understand when to stop. Once our score reaches a comfortable position on the leaderboard, we usually stop chasing distant containers. A few extra points are rarely worth losing a strong kit, a valuable key, or a successful extraction.
The three-hour leaderboard window creates three distinct phases.
The first few minutes are the most valuable for aggressive teams. Most players have not built a score yet, so two early safes can place a squad near the top before the field spreads out. During this phase, we prefer a direct route with one main objective rather than a long loot circuit.
Solo players should avoid copying a full squad's opening pace. A safe opened quickly is useful, but a failed push can end the run before the score starts to matter. For solo runs, we prefer one nearby safe and a compact container sweep.
The middle of the round is where decision making matters most. Check your position, compare it with the reward threshold, and decide whether to protect the score or take another risk.
If you are already inside the reward range, move toward an extraction point and pick up only containers along the way. If you are close to the cutoff, look for a safe that sits on your current route. If you are far behind, a regular container route will usually take too long to recover the gap. In that situation, we look for a second safe or rotate to a known high-density area.
The final part of the round is dangerous because many players make the same mistake: they keep searching after the expected value has dropped. A distant safe may provide fifty points, but it can also force a long rotation, expose your team to another squad, and leave you without enough time to extract.
Our rule is simple. If the score is good enough, we leave. If the score is close, we take one nearby objective. If the score is far behind, we only pursue a safe that can be reached quickly.
The reward menu should also shape your priorities. A Fulton Exfil can help players who regularly carry valuable loot. A Tempered Armor Vest improves survivability during future runs. UAVs are useful for squads that prefer active map control. Survival Kits are especially helpful for solo players who need another layer of recovery after a bad engagement.
The right target depends on the route, the map pressure, and the amount of time left in the round.
Regular containers are easy to underestimate. They do not create the same score spike as a safe, but they are reliable and widely spread across buildings. We use them in four situations:
A building cluster with eight to twelve containers can produce respectable points without forcing players into a predictable location. This is particularly useful for solo operators, who can move quietly from room to room and leave before enemy teams identify the route.
Regular containers also make good filler targets. If a player is moving from one safe to another, opening containers along the way adds points without changing the route. This is where a careful squad can outperform a team that focuses only on safes.
Safes give the largest single point increase and should be part of any serious leaderboard plan. Their value becomes even better when several safes are located within the same general area. Our favorite route structure is one safe near the initial landing point, a second safe inside the next compound, and regular containers placed between them.
Safe locations can change the shape of a match. Some are inside industrial buildings, while others sit in compounds where AI and enemy players can approach from several angles. Community map references currently list safe locations across areas such as Haneul Nuclear Reactor and several compound zones, but exact spawns and local danger can change with updates. Check the current map before publishing or relying on a fixed route.
The opening animation also creates a tactical problem. A player who starts a safe becomes predictable for a few seconds. Before interacting, we clear the nearest AI, check windows and rooftops, and identify the next escape route. If the area sounds busy, we delay the opening instead of forcing it.
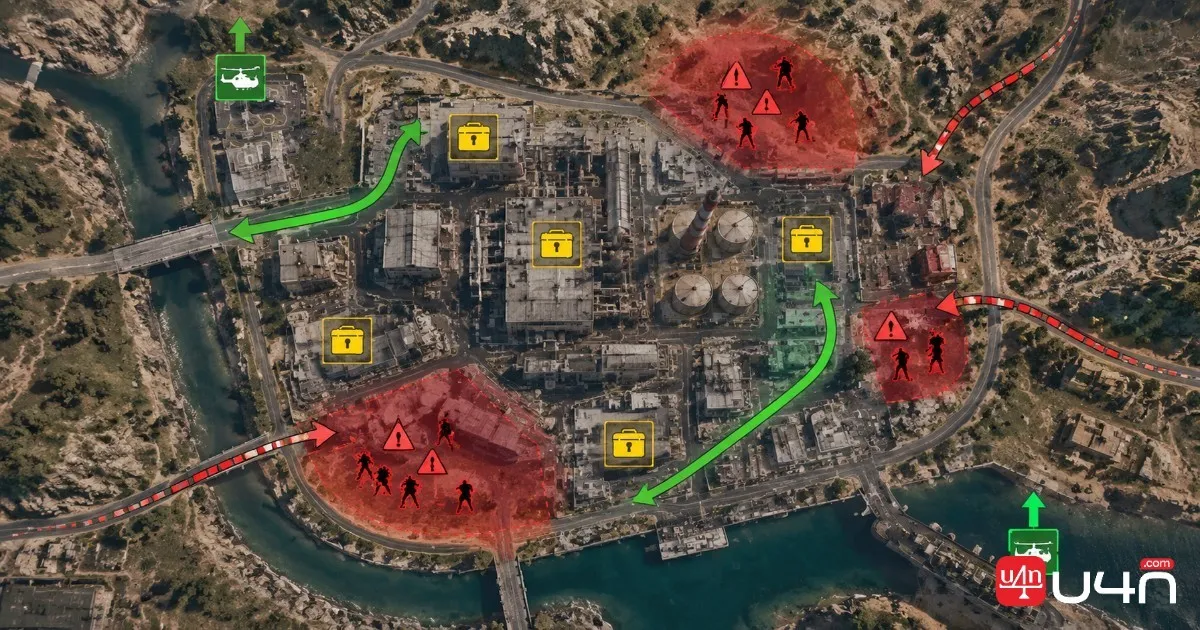
Solo players can score well, but they need shorter routes and stricter limits.

We recommend a four-step loop:
This route is less dramatic than a full safe rush, but it produces more completed runs. A solo player who extracts with fifty to one hundred points several times may earn better rewards than someone who repeatedly dies while chasing three safes in one deployment.
A good solo loadout should support movement and recovery. We prefer a flexible assault rifle or submachine gun, a smoke grenade, a reliable healing option, and equipment that helps detect nearby threats. Ammunition matters more than high-value loot during the early phase because running dry in a building can end the run quickly.
A safe should be abandoned when the surrounding conditions become worse than the expected score. We usually leave if:
This decision feels conservative, but it is one of the biggest differences between consistent solo players and players who only remember their best runs. The event rewards completed objectives, and survival keeps the equipment needed for the next attempt.
Experienced solo players can use a two-safe route when the map offers a clean connection between compounds. The goal is to open the first safe quickly, collect nearby containers, and move directly to the second location. There should be no unnecessary shopping, side missions, or extended looting.
Before opening the first safe, we decide whether the second safe is still realistic. If the first location takes too long, we switch to the extraction plan immediately. The route should remain flexible enough to change after one unexpected fight.
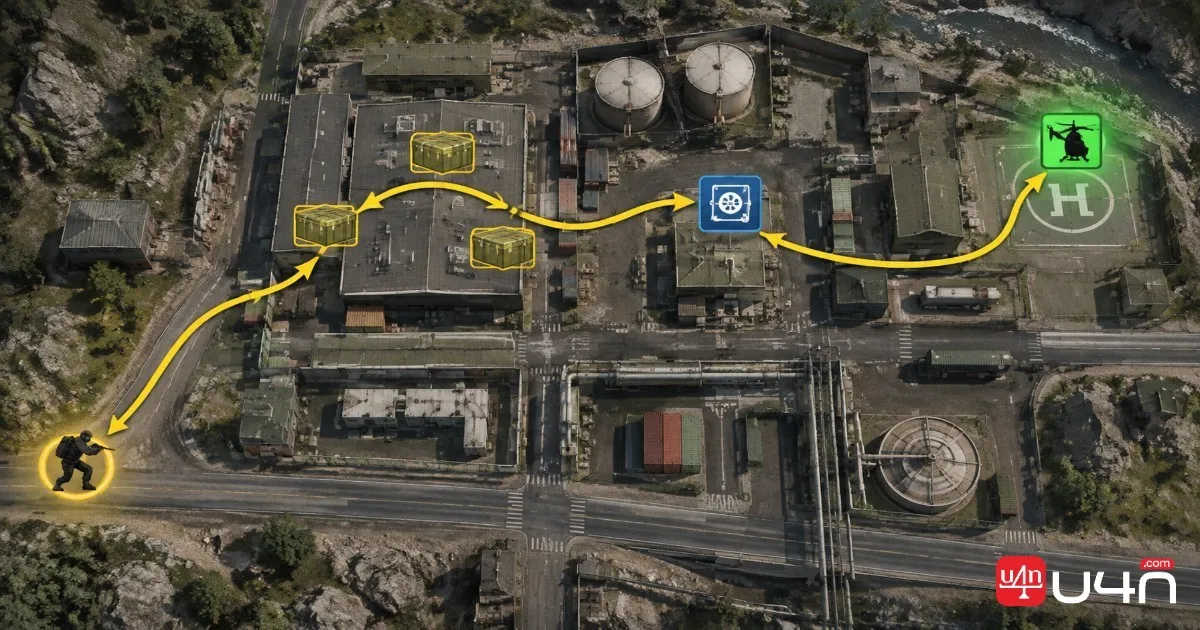
A two-player team can make the War Chest event much more efficient because both operators can work on separate tasks without losing control of the area.
One player handles the safe while the other controls the outside:
The outside player should not wander too far for a single container. Five points are rarely worth creating a gap that an enemy team can exploit.
Larger squads can split the search area into sections, but the split should be temporary. We usually assign one player to navigation, one to the safe, one to close security, and one to vehicle or extraction information.
The team leader should make the stop or continue call. Without a clear decision maker, squads often lose time debating the next location while the leaderboard window shrinks.
A larger team should also avoid unnecessary fights. A squad wipe may feel rewarding, but it does not automatically improve the War Chest score. If the enemy team is blocking the route, rotate through a different container cluster or approach the safe after the area quiets down.
Short callouts work better than long explanations:
Clear communication keeps the route moving and prevents a simple scoring event from becoming a chaotic loot chase.
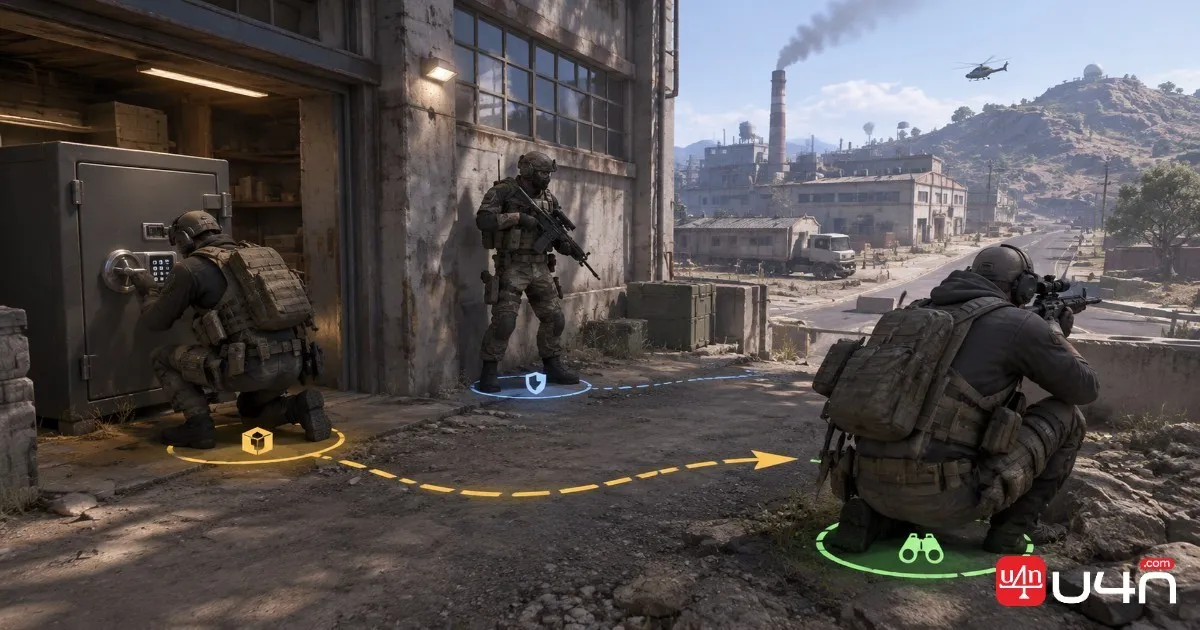
The best setup changes slightly between solo play and squad play, but a few priorities stay consistent.
A close-range weapon is useful for rooms, stairwells, and AI pushes. A rifle with stable recoil helps when the team must cross open ground or protect the safe from outside pressure. We avoid overly specialized builds during scoring runs because the route may force several different types of fights.
A large magazine can also save time. Replacing armor or reloading during the safe interaction window is risky, so we prepare before starting the animation.
Smoke grenades are valuable for solo rotations and emergency extraction approaches. Snapshot or detection tools help identify threats before a player commits to a fixed safe location. Squad members should divide these tools rather than carrying identical equipment.
One player should carry equipment for the approach. Another should reserve a defensive option for the retreat. Using every tactical item before the safe opens can leave the team exposed during the most predictable part of the route.
We keep room for ammunition, armor, recovery items, and any key required for the planned route. Low-value loot should be dropped quickly. A full backpack makes players slower to react and can force bad choices when a useful item appears.
The event is about opening targets, so the inventory should support more openings and safer extractions. Valuable loot is welcome, but it should not pull the team away from the scoring plan.
A map may contain several safes, but that does not mean one squad should attempt to open them all. Each location has a travel cost, and the final safe often attracts players who followed the same public route.
Regular containers are the easiest way to add points during movement. Leaving them closed while walking between safes wastes scoring opportunities. We open them when they are inside the route, especially near extraction.
A strong score can disappear in one bad fight. Once the reward threshold is secured, extraction becomes the main objective. There is no advantage in losing an entire run for another fifty points if the leaderboard already favors you.
The round timer should affect every decision. Long rotations become worse as the round closes, and extraction itself takes time. We start planning the exit before the final objective rather than waiting until the map forces the decision.
Some players interrupt a good route to search for an upgrade or spend time checking every shop. If the current equipment can handle one more safe and an extraction, we keep moving. Extra purchases are only useful when they directly improve survival or route speed.
Our team uses a simple route test before committing to a leaderboard push.
First, we identify the nearest safe and estimate the time required to reach it. Then we mark the regular containers between the starting area and the safe. After that, we locate the closest extraction option and check whether the second safe sits naturally along the path.
A route is ready when it meets three conditions:
This process is also where we separate event preparation from unnecessary spending. Players who are short on a particular vest, weapon, or key may consider buy MW4 DMZ Items services, but the War Chest route itself still rewards planning, positioning, and extraction discipline. Any purchased equipment should support the run rather than encourage players to take fights they would normally avoid.
Once inside the match, we update the route after every major event. A nearby enemy team, a bad spawn, a delayed safe animation, or a sudden loss of armor can change the value of the next objective. A fixed route is useful for learning the map, but a flexible route is better for winning the leaderboard.
A fixed route is useful for learning the map, but a flexible route is better for winning the leaderboard.
A regular container gives five points.
A safe gives fifty points, equal to ten regular containers.
Each leaderboard round lasts three hours, with a new round starting every four hours.
No. Each listed reward can be earned once, so later rounds are useful for other rewards or leaderboard placement rather than repeating the same item.
Yes. Solo players should focus on compact routes, one safe at a time, and early extraction. The event becomes much more manageable when the route is built around survival instead of maximum points per deployment.
Safes provide the strongest score increase. Regular containers offer safer and more consistent progress. The most reliable plan uses safes as primary targets and regular containers as route fillers.
Leave before the run becomes greedy. A player who extracts with a strong score can enter the next round with better equipment and a clearer route. That repeatable rhythm usually produces better results than a single high-risk attempt.